Upcycling. It’s a very broadly used term, but essentially it comes down to the concept of taking something old that has been used for one person and using your crafting skills to ‘upcycle’ it into something new that can be used again for a new purpose. Learn more senior apartments.
Upcycling has many benefits for both the planet and the individual: cutting down on single-use items inevitably reduces waste that goes to landfill or is recycled (producing CO2 in the process); and it reduces the number of items that need to be purchased, saving money whilst reducing demand and thus, manufacturing costs, waste, AND emissions. Essentially, creating a circular economy (an economy where everything is recycled or upcycled rather than disposed of) makes for both a happier planet and is an excellent way of saving a few extra pennies.
Re-use and Recycle
Some of the best ways to contribute towards a circular economy are to purchase the bare minimum of products (re-using what you have first if you can) and to choose products that are natural, sustainable and have either biodegradable or recyclable (and definitely upcyclable!) packaging. Some brands have also started upcycling return systems through which you can bring back used packaging to be upcycled and used again. Additionally, if you have a refill shop nearby then taking your own containers to refill with everyday products like soap and washing up liquid, as well as food items like pasta and rice, is another excellent way of contributing. Even if everyone in your own town did this once, think of how many plastic bottles and packets you’d save!
However, upcycling can often be a time-consuming and not always enjoyable task and ideally, no one really wants to add another thing to the to-do list. An easy way to help come up with simple upcycling ideas is to follow plastic-free and sustainable brands and bloggers on social media, as well as checking their websites. From just a quick search it is easy to find lots of people out there publishing their upcycling and eco-friendly living tips and recommendations for you to borrow.
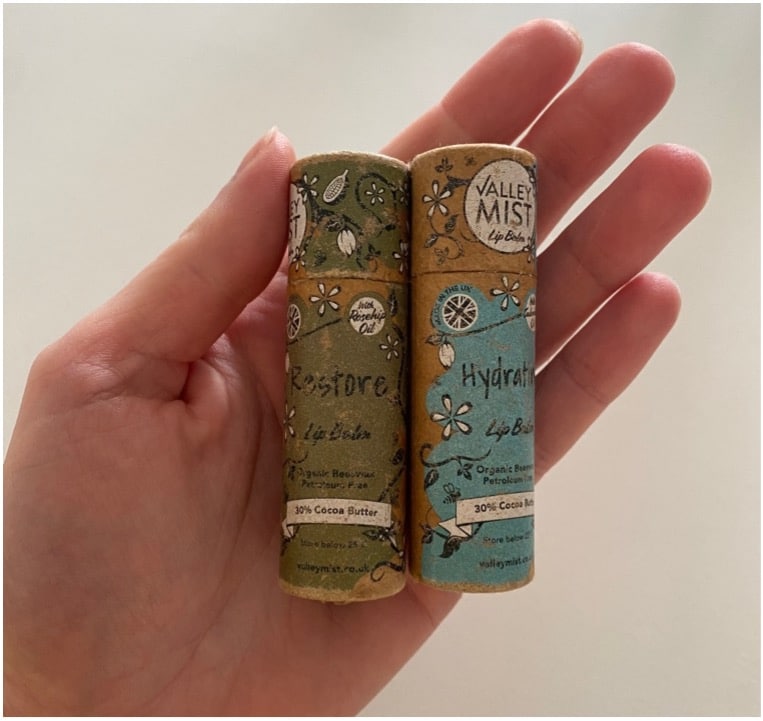
Plastic Free Lip Balm Tube Craft
In the following text you can find my own fun solution to upcycling one of the more difficult pieces of waste to find a purpose for… a lip balm tube. This project can be done with the help of your little ones too and is a great way to introduce them to the concept of upcycling. So, read on for some instructions on how to craft your very own flower fairy seedling starter pot from an empty lip balm tube…
How To Make Your Flower Fairy Seedling Starter Pot
Step 1
As with any craft, the first thing to do is gather your materials. You will need:
- One empty plastic free lip balm tube, wound down most of the way to leave plenty of room for compost.
- Some paper.
- A pencil.
- A pen.
- An eraser.
- Some colouring pencils or paints.
- A ruler or tape measure.
- Scissors (make sure an adult handles these).
- Glue.
- Compost.
- Any seeds of your choice.
Step 2
After assembling your materials, cut out a rectangle of paper with the same dimensions as your lip balm tube, long enough to wrap all the way around without covering the top or the bottom of the tube. You may need to measure the tube first, or just use trial and error!
Step 3
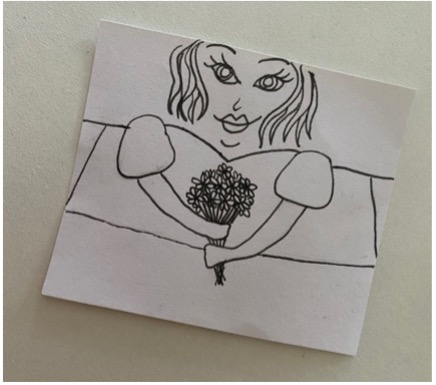
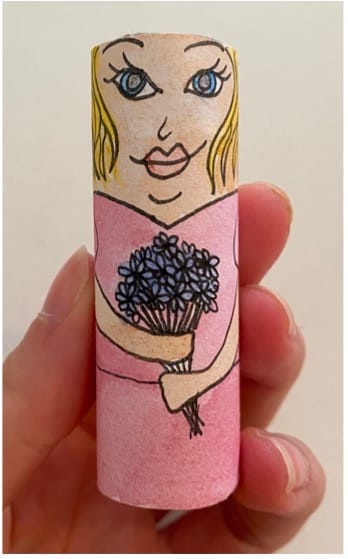
When you have your rectangle of paper draw a straight pencil line across to separate the top third of the paper (the third that will be at the top of the tube). This top third will be your fairy’s face.
Step 4
You should now begin to fill out some details. I would advise drawing them out in pencil first before going over them in pen when you are sure you are happy. Remember as you draw that this piece of paper will wrap all the way around the tube, so positioning of the arms etc. can be tricky to get right and might take a couple of tries! But don’t worry about giving them any wings yet, we’ll get to that bit later.
Step 5
When you are happy with your drawing, go over the pencil lines with a pen. Then erase the pencil lines from underneath.
Step 6
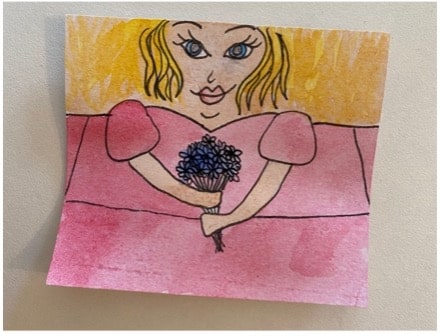
Now it’s time to add some colour! Using coloured pencils, paints, or even collage if you’re feeling adventurous, colour in your flower fairy and then set them aside for a moment.
Step 7
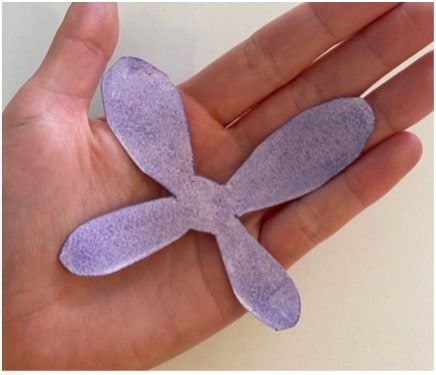
Draw your flower fairy’s wings on the leftover paper and cut them out.
Step 8
Colour in the wings (don’t forget to colour both sides this time, as both will be visible).
Step 9
Time to assemble your fairy! First take your rectangle of paper with your fairy drawing and cover the reverse side in glue.
Step 10
Wrap the rectangle of paper around the lip balm tube and stick it firmly.
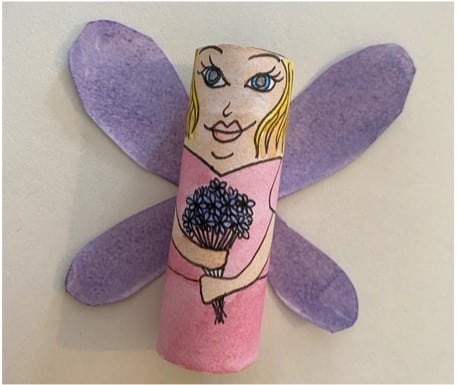
Step 11
Next, take the wings and add a small amount of glue to the very centre of them, where the wings will meet your fairy’s back. Stick them to the back of the tube. You should now have a lip balm tube that resembles a flower fairy!
Step 12
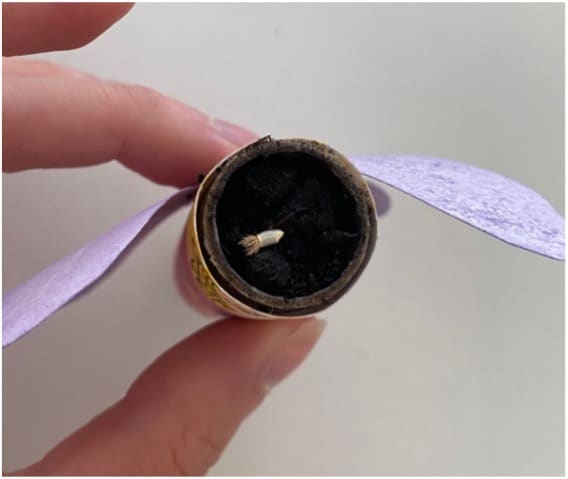
Fill the centre of your lip balm tube with compost and add a little water to make the soil moist.
Step 13
Create a few small holes in the compost using a sharp pencil.
Step 14
Place the seeds of your choice into these holes and cover over with the compost. Check the growing instructions on your chosen seeds to see how much space and water they need and adjust the instructions accordingly. Cress would work well in these, as would many smaller herbs.
Step 15
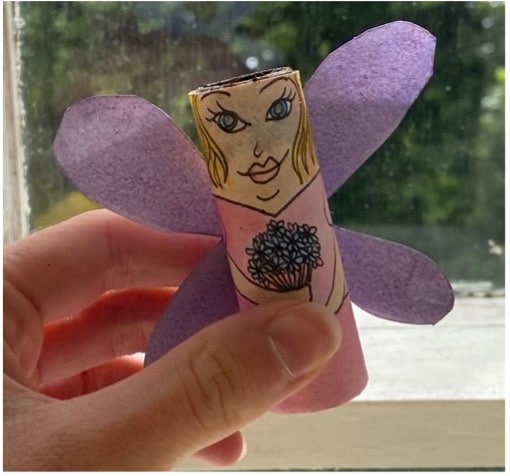
Leave your flower fairy in a sunny spot, like a windowsill and water regularly, according to the instructions on your seeds.
Step 16
Watch your flower fairy’s hair grow!
I really hope you enjoy making these upcycled flower fairy starter pots! They are a not only a brilliantly fun project, but are a great opportunity to introduce children to upcycling and growing their own food. Of course, if you’d rather not make a flower fairy you can always use these instructions to make something else instead, perhaps an animal!


